Content Menu
● Introduction to Replicator 2 Extruder Upgrades
>> Benefits of Aluminum Extruder Upgrades
● Preparing for the Upgrade
● Step-by-Step Installation Guide
>> Step 1: Unload Filament and Prepare the Printer
>> Step 2: Remove the Stock Extruder
>> Step 3: Install the Aluminum Extruder
>> Step 4: Final Adjustments and Testing
● Tips for Successful Installation
● Troubleshooting Common Issues
● Additional Upgrades for Enhanced Performance
● Best Practices for Printing with the Upgraded Replicator 2
● Conclusion
● FAQ
>> 1. What are the benefits of using an aluminum extruder on the Replicator 2?
>> 2. How do I ensure proper alignment during the installation?
>> 3. Can I use the aluminum extruder with any type of filament?
>> 4. What tools do I need for the installation?
>> 5. Are there any specific precautions I should take during the upgrade?
● Citations:
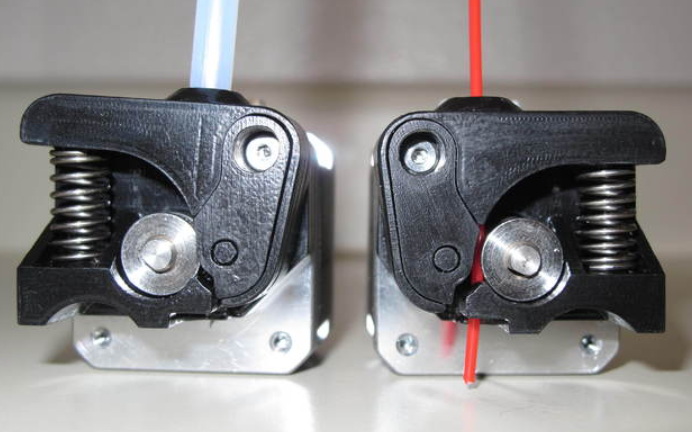
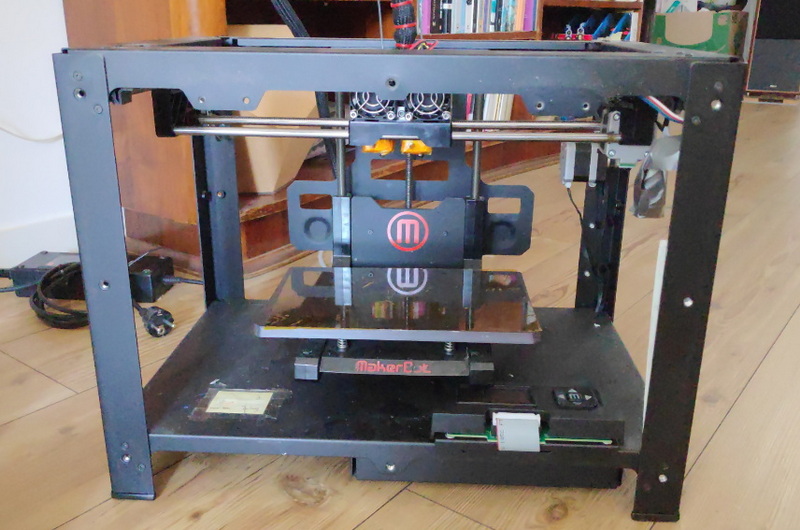
Upgrading your MakerBot Replicator 2 with an aluminum extruder can significantly enhance its performance and reliability. The aluminum extruder is designed to improve heat dissipation and reduce wear on moving parts, leading to better print quality and fewer maintenance issues. Here's a step-by-step guide on how to install an aluminum extruder upgrade on your Replicator 2.

Introduction to Replicator 2 Extruder Upgrades
The MakerBot Replicator 2 is a popular 3D printer known for its reliability and versatility. However, like any machine, it can benefit from upgrades to improve its functionality. One of the most impactful upgrades is replacing the stock extruder with an aluminum version. This upgrade not only enhances the printer's thermal management but also provides a more robust and durable extrusion system.
Benefits of Aluminum Extruder Upgrades
- Improved Thermal Management: Aluminum is an excellent heat conductor, which helps in maintaining consistent temperatures within the extruder, reducing thermal runaway issues.
- Durability: Aluminum parts are generally more robust than their plastic counterparts, reducing wear and tear over time.
- Enhanced Print Quality: By maintaining stable temperatures and reducing mechanical stress, aluminum extruders can lead to more consistent and higher-quality prints.
Preparing for the Upgrade
Before starting the installation, ensure you have all the necessary tools and parts. Here's a checklist:
- Tools Needed:
- 2 mm Hex Wrench
- 2.5 mm Hex Wrench
- Pliers (for handling small parts)
- Parts Needed:
- Aluminum Extruder Assembly
- Mounting Screws (usually M3 or M4)
- Thermal Break Tube (if upgrading)
- New Nozzle (optional)
Step-by-Step Installation Guide
Step 1: Unload Filament and Prepare the Printer
1. Unload Filament: Use the Replicator 2's control panel to unload any filament currently loaded. Go to Utilities > Change Filament > Unload.
2. Turn Off and Unplug: Ensure the printer is turned off and unplugged to prevent any accidental starts during the upgrade process.
Step 2: Remove the Stock Extruder
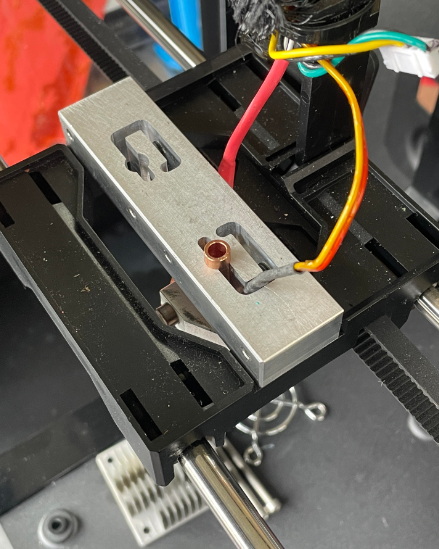
1. Remove Fan and Heat Sink: Use a 2.5 mm hex wrench to loosen the bolts holding the fan and heat sink in place. Gently pull them away from the extruder motor.
2. Disconnect Motor Plug: Carefully remove the plug from the top of the extruder motor.
3. Slide Out the Motor: Gently slide the motor out of its carriage.
Step 3: Install the Aluminum Extruder
1. Mount the Aluminum Extruder: Align the new aluminum extruder with the motor carriage. Use the provided screws to secure it in place.
2. Reconnect Motor Plug: Once the extruder is mounted, reconnect the motor plug.
3. Reattach Fan and Heat Sink: Slide the fan and heat sink back into place and tighten the bolts securely.
Step 4: Final Adjustments and Testing
1. Load Filament: Load a new filament using the Replicator 2's control panel. You may need to adjust the loading process slightly due to the new extruder design.
2. Test Print: Perform a test print to ensure everything is working correctly and to adjust any settings as needed.

Tips for Successful Installation
- Ensure Proper Alignment: Make sure all parts are properly aligned before tightening screws to avoid any mechanical stress.
- Check for Leaks: After installing the new extruder, check for any signs of leaks or gaps where hot plastic could escape.
- Monitor Temperatures: Keep an eye on the extruder temperatures during the first few prints to ensure they remain stable.
Troubleshooting Common Issues
During and after the upgrade, you might encounter some common issues. Here are some troubleshooting tips:
- Heat Creep: This can occur if the heater block insulation is insufficient or if the front extruder fan is not functioning correctly. Ensure all connections are secure and consider upgrading the insulation or fan if necessary[2].
- Clogs: If you experience clogs, it might be due to a worn-out nozzle or poor filament quality. Consider replacing the nozzle or using a different filament[2].
- Drive Block Spring Issues: If the drive block spring is worn out, it may not provide enough tension, leading to under-extrusion. Consider replacing the spring if this is the case[2].
Additional Upgrades for Enhanced Performance
Besides the aluminum extruder, there are other upgrades you can consider to further enhance your Replicator 2's performance:
- Aluminum Z-Axis Stage Upgrade: This upgrade helps reduce flex and vibration in the Z-axis, improving print stability and quality. It involves replacing the stock Z-axis stage with an aluminum one and installing linear bearings for smoother movement[4].
- Heated Build Plate: Adding a heated build plate can improve adhesion and reduce warping, especially when printing with ABS or PETG. Ensure the printer's electronics can handle the additional power requirements[5].
Best Practices for Printing with the Upgraded Replicator 2
After installing the aluminum extruder, follow these best practices to optimize your printing experience:
- Regular Maintenance: Regularly inspect and clean the extruder and hotend to prevent clogs and ensure optimal performance.
- Calibration: Calibrate the extruder and print bed regularly to maintain precise control over print quality.
- Filament Quality: Use high-quality filament to minimize issues like clogs and inconsistent extrusion.
Conclusion
Upgrading your MakerBot Replicator 2 with an aluminum extruder is a straightforward process that can significantly enhance your printing experience. By following these steps and ensuring all parts are properly aligned and secured, you can enjoy improved print quality and reduced maintenance needs.

FAQ
1. What are the benefits of using an aluminum extruder on the Replicator 2?
The aluminum extruder offers better thermal management, increased durability, and enhanced print quality compared to the stock plastic extruder.
2. How do I ensure proper alignment during the installation?
Proper alignment is crucial to avoid mechanical stress. Use the mounting screws to secure the extruder in place, ensuring all parts fit snugly without forcing them.
3. Can I use the aluminum extruder with any type of filament?
Yes, the aluminum extruder supports a wide range of filaments, including PLA, ABS, and PETG. However, ensure the extruder is properly calibrated for the specific filament being used.
4. What tools do I need for the installation?
You will need a 2 mm hex wrench, a 2.5 mm hex wrench, and pliers for handling small parts.
5. Are there any specific precautions I should take during the upgrade?
Yes, be careful not to bend the thermistor cable during the process, as this can require replacing the thermistor. Also, ensure the printer is unplugged to prevent accidental starts.
Citations:
[1] https://www.youtube.com/watch?v=w8kXiKLdu5E
[2] https://www.fargo3dprinting.com/how-to/troubleshoot/makerbot-replicator-2/
[3] https://3dprintingindustry.com/news/the-replicator-2-an-honest-overview-of-the-machine-and-the-experience-11445/
[4] https://www.instructables.com/Makerbot-Replicator-2-Aluminum-Z-Axis-Stage-Upgrad/
[5] https://www.reddit.com/r/makerbot/comments/17ovmk5/improving_replicator_2_extruder_situation/
[6] https://www.youtube.com/watch?v=x82pfCGb2nU
[7] https://www.hubs.com/talk/t/best-printing-practices-on-makerbot-replicator-2-and-2x/581/37
[8] https://groups.google.com/g/makerbot/c/9gGY5r1ekHQ
[9] https://www.youtube.com/watch?v=LgU7bv0zS7M
[10] https://groups.google.com/g/makerbot/c/unAXKmDvUFw
[11] https://www.reddit.com/r/makerbot/comments/16q9uis/looking_for_makerbot_replicator_2x_new_or/
[12] https://groups.google.com/g/3d-printing-tips--tricks/c/g6hD_PRTwd4
[13] https://forum.makerforums.info/t/i-am-trying-to-fix-extrusion-issues-on-this-replicator-2/47272
[14] https://www.thingiverse.com/thing:42250
[15] https://www.reddit.com/r/makerbot/comments/1besc50/best_option_for_replacement_extruder_on/
[16] https://www.bassybeats.co.nz/projects/3d-printing/makerbot-replicator-2-restoration/
[17] https://transistor-man.com/waking_up_a_replicator2.html
[18] https://support.ultimaker.com/s/article/Replicator-2X-Tips
[19] https://www.hubs.com/talk/t/makerbot-replicator-2x-issues/1328/10
[20] https://reprap.org/forum/read.php?1%2C874326


