Content Menu
● Understanding Aluminum Extruder Back Drop Rails
>> Key Advantages of Aluminum Extruder Back Drop Rails:
● Tools and Materials Checklist
● Preparation Steps
● Step-by-Step Installation Guide
● Ensuring Proper Alignment
● Addressing Common Issues
● Advanced Techniques and Tips
● Quality Control and Maintenance
● Conclusion
● Frequently Asked Questions (FAQ)
>> Q1: What are the primary advantages of using aluminum extruder back drop rails?
>> Q2: What tools are essential for installing aluminum extruder back drop rails?
>> Q3: How do I ensure proper alignment during installation?
>> Q4: What should I do if the rails are not aligning properly?
>> Q5: How often should I perform maintenance on the installed rails?
● Citations:
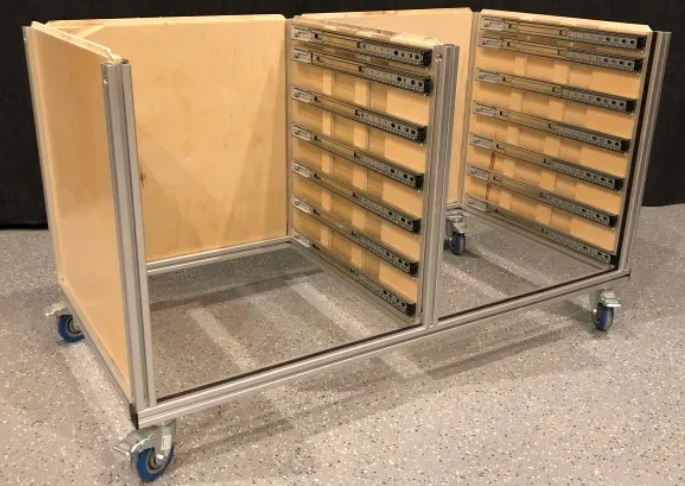
Aluminum extruder back drop rails are essential components in various applications, ranging from photography backdrops to sophisticated automation systems. Their lightweight nature, coupled with remarkable strength and adaptability, makes them a preferred choice for creating stable and adjustable support structures. Correct installation is crucial to harness the full potential of these rails, ensuring structural integrity, alignment precision, and overall system longevity. This article provides a comprehensive guide to installing aluminum extruder back drop rails efficiently, covering essential preparations, step-by-step installation procedures, and crucial quality checks.

Understanding Aluminum Extruder Back Drop Rails
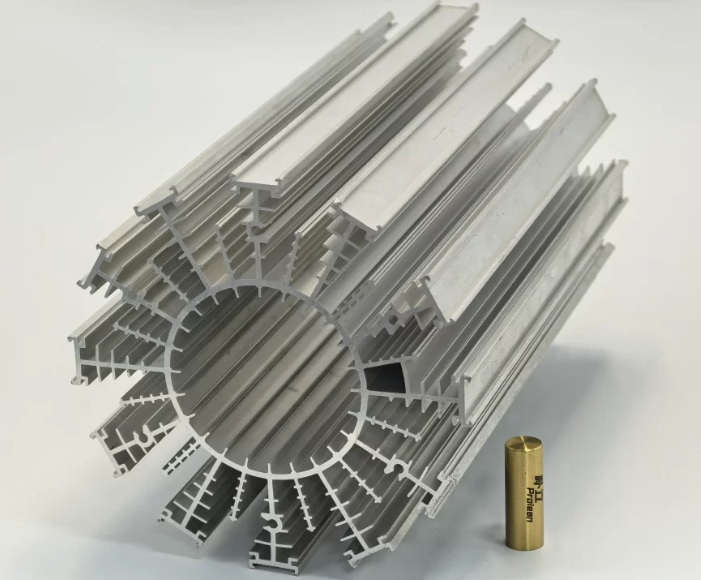
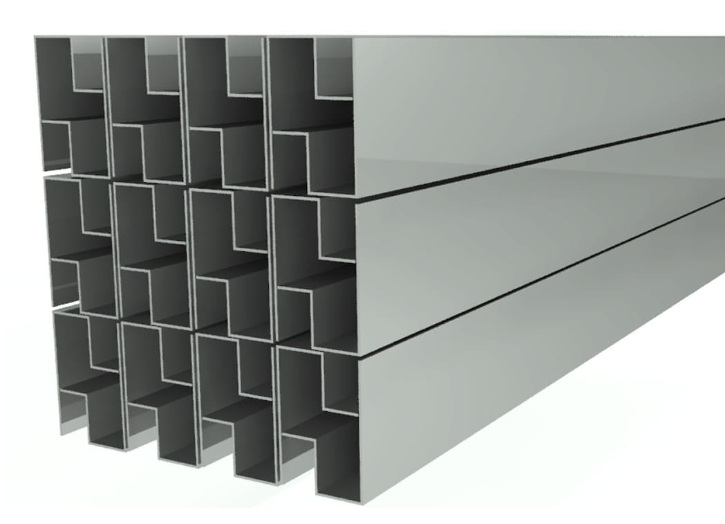
Before diving into the installation process, understanding the basics of aluminum extrusions is beneficial. Aluminum extrusions are created by forcing heated aluminum through a die, producing consistent profiles with intricate cross-sectional shapes[6]. These profiles often feature T-slots or V-slots, which allow for modular connections using T-nuts or other specialized fasteners[1][3].
Key Advantages of Aluminum Extruder Back Drop Rails:
- Lightweight: Easy to handle and maneuver during installation.
- High Strength-to-Weight Ratio: Provides robust support without excessive weight.
- Modularity: T-slots and V-slots enable flexible connections and adjustments.
- Corrosion Resistance: Suitable for various environments, including those with moderate humidity.
- Aesthetic Appeal: Clean and professional look suitable for display and functional applications.
Tools and Materials Checklist
Having the right tools and materials on hand is crucial for efficient installation. Here's a comprehensive checklist:
- Aluminum Extruder Back Drop Rails: Ensure you have the correct length and profile for your application.
- T-Nuts or V-Slot Nuts: These fasteners slide into the T-slots or V-slots to secure connecting components[1][3].
- Connecting Brackets: Corner brackets, angle brackets, and joining plates provide structural connections[3].
- Screws and Bolts: Appropriate sizes and lengths for securing brackets and components.
- Measuring Tape: For accurate measurements and alignment.
- Level: To ensure horizontal and vertical alignment.
- Allen Wrenches: For tightening T-nuts and set screws.
- Screwdrivers: Both Phillips head and flat head may be required.
- Drill: With appropriate drill bits for pilot holes and fastener installation.
- Miter Saw or Hand Saw: For cutting rails to specific lengths (if required)[4].
- Deburring Tool: To remove sharp edges after cutting.
- Safety Glasses: To protect your eyes from debris.
- Work Gloves: To improve grip and protect your hands.
- Pencil or Marker: For marking measurements and cutting lines.
Preparation Steps
Proper preparation is vital for a smooth and accurate installation.
1. Planning and Design: Before starting, plan the layout and design of your back drop system. Consider the dimensions, weight requirements, and adjustability needs.
2. Cutting Rails (If Necessary): If the rails need to be cut to a specific length, use a miter saw with a non-ferrous blade for clean and accurate cuts[4]. Always deburr the cut edges to remove sharp burrs.
3. Cleaning: Clean the aluminum extrusions to remove any dirt, grease, or debris. Use a mild detergent and water, then dry thoroughly.
4. Layout and Marking: Lay out the rails on a flat surface and mark the locations for brackets, connectors, and mounting points.
5. Pre-Assembly: Pre-assemble components such as corner brackets and T-nuts to streamline the installation process[1][3].

Step-by-Step Installation Guide
Follow these steps for installing aluminum extruder back drop rails efficiently:
1. Insert T-Nuts: Slide T-nuts into the T-slots at the marked locations. Ensure they are oriented correctly for attaching brackets or other components[1][3][5].
2. Attach Corner Brackets: Position corner brackets at the corners of the frame and align them with the T-nuts. Secure the brackets using appropriate screws or bolts. Tighten the fasteners, but not completely, to allow for adjustments[3].
3. Install Joining Plates: If connecting rails end-to-end, use joining plates to provide a secure connection. Align the joining plates with the T-slots and secure them with T-nuts and screws.
4. Mounting to a Surface: If the back drop system needs to be mounted to a wall or other surface, use appropriate mounting brackets. Position the brackets at the marked locations and secure them to the rails using T-nuts and screws. Ensure the mounting surface is strong enough to support the weight of the system[3].
5. Horizontal and Vertical Alignment: Use a level to check the horizontal and vertical alignment of the rails. Make any necessary adjustments by loosening the fasteners and repositioning the components. Once the alignment is correct, fully tighten all screws and bolts[2].
6. Install Additional Supports: For larger back drop systems, install additional supports to prevent sagging or bending. These supports can be vertical posts or diagonal braces attached to the rails using T-nuts and brackets.
7. Cable Management: Incorporate cable management solutions, such as cable trays or clips, to keep cables organized and out of the way. Attach these solutions to the rails using T-nuts and screws[1].
8. Final Tightening and Inspection: Once all components are installed and aligned, double-check all fasteners to ensure they are properly tightened. Inspect the entire system for any loose connections or misalignments.
Ensuring Proper Alignment
Proper alignment is crucial for the stability and functionality of aluminum extruder back drop rails[2][5]. Here are several techniques to ensure accurate alignment:
- Use a Precision Level: A high-quality level is essential for ensuring horizontal and vertical alignment. Check the rails at multiple points and make adjustments as needed.
- String Lines: Use string lines to create straight reference lines for aligning the rails. Stretch the string tightly between two points and align the rails along the line.
- Laser Alignment Tools: Laser levels and laser alignment tools provide highly accurate alignment. Use these tools to check the alignment of the rails and make precise adjustments.
- Digital Angle Finders: Digital angle finders can measure angles and slopes accurately. Use these tools to ensure that the rails are aligned at the correct angles.
- Parallel Rail Installation: When mounting a pair of rails which will be attached to a single part, such as a printer bed support, ensure that the rails remain parallel to each other[5].
- Tolerance Considerations: Be aware of manufacturing tolerances in aluminum extrusions. Small variations can affect alignment, so make adjustments accordingly.
Addressing Common Issues
During installation, you may encounter some common issues. Here's how to address them:
- Rails Not Aligning: If the rails are not aligning properly, loosen the fasteners and reposition the components. Check for any obstructions or misalignments in the T-slots.
- Connections Not Secure: If the connections are not secure, ensure that the T-nuts are properly seated in the T-slots and that the screws are tightened adequately. Consider using thread-locking compounds for added security.
- Sagging or Bending: If the rails are sagging or bending, add additional supports to increase the structural integrity. Use vertical posts or diagonal braces to reinforce the system.
- Vibration: To minimize vibration, use vibration-damping mounts or pads. These mounts can absorb vibrations and reduce noise.
Advanced Techniques and Tips
For more complex installations, consider these advanced techniques and tips:
- Finite Element Analysis (FEA): Use FEA software to simulate the structural behavior of the back drop system. This analysis can help identify potential weak points and optimize the design for maximum strength and stability.
- Thermal Considerations: In environments with significant temperature variations, account for thermal expansion and contraction. Use expansion joints or flexible connectors to accommodate these changes.
- Load Distribution: Distribute the load evenly across the rails to prevent localized stress concentrations. Use load-spreading plates or supports to distribute the weight.
- Custom Brackets: Design and fabricate custom brackets for unique mounting requirements. These brackets can provide a more secure and tailored fit.
- Anodizing and Coating: Consider anodizing or coating the aluminum extrusions to enhance their corrosion resistance and aesthetic appeal.
- Grounding: Ground the aluminum extrusions to prevent electrical hazards. Use grounding straps and connectors to create a continuous electrical path to ground.
Quality Control and Maintenance
After installation, perform regular quality control checks to ensure the system remains in optimal condition:
- Inspect Fasteners: Check all screws and bolts regularly to ensure they are tight. Retighten any loose fasteners.
- Check Alignment: Verify the horizontal and vertical alignment periodically. Make adjustments as needed.
- Clean Rails: Clean the aluminum extrusions regularly to remove dirt and debris. Use a mild detergent and water, then dry thoroughly.
- Lubricate Moving Parts: Lubricate any moving parts, such as sliding connectors or adjustable supports, to ensure smooth operation.
- Replace Worn Components: Replace any worn or damaged components promptly to maintain the structural integrity of the system.
Conclusion
Efficiently installing aluminum extruder back drop rails requires careful planning, precise execution, and attention to detail. By following the steps outlined in this guide, you can create a robust and adaptable support structure that meets your specific needs. Remember to use the right tools and materials, ensure proper alignment, and perform regular quality control checks to maintain the system's integrity and longevity. Whether for photography, automation, or display purposes, a well-installed aluminum extruder back drop rail system provides a solid foundation for success.

Frequently Asked Questions (FAQ)
Q1: What are the primary advantages of using aluminum extruder back drop rails?
Aluminum extruder back drop rails offer several advantages, including their lightweight nature, high strength-to-weight ratio, modularity, corrosion resistance, and aesthetic appeal. These properties make them ideal for creating stable and adjustable support structures.
Q2: What tools are essential for installing aluminum extruder back drop rails?
Essential tools include measuring tape, a level, Allen wrenches, screwdrivers, a drill, a miter saw (if cutting is required), a deburring tool, safety glasses, and work gloves. Having the right tools ensures accuracy and safety during installation.
Q3: How do I ensure proper alignment during installation?
To ensure proper alignment, use a precision level, string lines, laser alignment tools, or digital angle finders. Check the alignment at multiple points and make adjustments as needed.
Q4: What should I do if the rails are not aligning properly?
If the rails are not aligning properly, loosen the fasteners and reposition the components. Check for any obstructions or misalignments in the T-slots.
Q5: How often should I perform maintenance on the installed rails?
Perform regular quality control checks, including inspecting fasteners, checking alignment, cleaning the rails, and lubricating moving parts, at least every three to six months, depending on the environment and usage intensity.
Citations:
[1] https://docs.opulo.io/semi-assembly/assembling-frame/
[2] https://ratrig.dozuki.com/Guide/01.+Basic+Machine+Assembly/1
[3] https://docs.opulo.io/byop/mechanical-assembly/5-connecting-sides/
[4] https://www.timbertech.com/wp-content/uploads/2020/03/impression-rail-express-installation-guide.pdf
[5] https://ratrig.dozuki.com/Guide/01.+Linear+Rail+Set+Up+and+Installation/8
[6] https://www.youtube.com/watch?v=CwGimohCH8A
[7] https://imakerstore.com/blog-3
[8] https://www.youtube.com/watch?v=UtemZqFJ5rY
[9] https://www.cnczone.com/forums/diy-cnc-router-table-machines/349456-best-method-interfacing-linear-square-rail-80-a.html
[10] https://www.youtube.com/watch?v=3L3nPJZo04E
[11] https://www.youtube.com/watch?v=pVFlGRmqNxI
[12] https://www.reddit.com/r/hobbycnc/comments/e2ex1l/can_you_mount_linear_rails_directly_to_the/
[13] https://www.youtube.com/watch?v=ayzEibdlz0g
[14] https://aluminium.org.au/wp-content/uploads/2023/01/Aluminium-Extrusion-Manual-Feb23.pdf
[15] https://hackaday.com/2021/05/25/getting-started-with-aluminum-extrusions/
[16] https://www.eztube.com/understanding-linear-rail-extrusions/
[17] https://www.lightmetalage.com/resources/patents/aluminum-extrusion-applications/
[18] https://www.shutterstock.com/search/aluminium-extrusion-manufacturing
[19] https://www.vecteezy.com/free-photos/aluminum-extrusion
[20] https://www.youtube.com/watch?v=CwGimohCH8A
[21] https://cdn.automationdirect.com/static/catalog/images/product-pdf/ATR-Aluminum-TSlotted-Rails-Overview.pdf
[22] https://www.youtube.com/watch?v=AKssPWSYZwg
[23] https://www.jeepgladiatorforum.com/forum/threads/diy-aluminum-extrusion-t-slot-rack-for-bak-revolver-x4s.59111/
[24] https://www.youtube.com/watch?v=BgJCtKxBe_E
[25] https://www.crlaurence.ca/products/brands/listing/H12HF_TH_Hos
[26] https://www.youtube.com/watch?v=iBoecaVaWkA
[27] https://www.eztube.com/product/106/
[28] https://www.otalum.com/the-difference-and-advantages-of-the-front-and-back-loading-methods-of-aluminum-extruder.html


