Content Menu
● Why Build an Enclosure?
● Materials Needed
● Designing Your Enclosure
>> Step 1: Measure Your Printer
>> Step 2: Create a Design Plan
>> Step 3: Choose Your Materials
● Building the Frame
>> Step 4: Cut the Aluminum Extrusions
>> Step 5: Assemble the Frame
>> Step 6: Attach the Panels
● Adding Doors and Ventilation
>> Step 7: Install Doors
>> Step 8: Install Fans
● Finishing Touches
>> Step 9: Add Lighting
>> Step 10: Organize Your Space
● Testing Your Enclosure
● Maintenance Tips
● Conclusion
● Frequently Asked Questions
>> 1. What materials are best for a 3D printer enclosure?
>> 2. How do I ensure proper ventilation in my enclosure?
>> 3. Can I use a 3D printer enclosure for all types of printers?
>> 4. How much does it cost to build a custom 3D printer enclosure?
>> 5. Is it necessary to have an enclosure for a 3D printer?
Building a custom 3D printer enclosure using aluminum extrusion is a rewarding project that can significantly enhance your 3D printing experience. An enclosure helps maintain a stable temperature, reduces noise, and protects your printer from dust and debris. In this article, we will guide you through the process of designing and constructing your own 3D printer enclosure, covering everything from materials and tools to assembly and finishing touches.

Why Build an Enclosure?
Before diving into the construction process, let's discuss why you might want to build an enclosure for your 3D printer:
1. Temperature Control: Enclosures help maintain a consistent temperature around the printer, which is crucial for printing materials like ABS that are sensitive to temperature fluctuations. A stable environment reduces the risk of warping and improves adhesion to the print bed.
2. Noise Reduction: 3D printers can be noisy, especially during long print jobs. An enclosure can help dampen the sound, making it more pleasant to work in the same space or to have the printer running overnight without disturbing others.
3. Dust Protection: Keeping your printer enclosed protects it from dust and other contaminants that can affect print quality. Dust can settle on the print bed and the extruder, leading to poor adhesion and print defects.
4. Safety: An enclosure can prevent accidental contact with hot components, making it safer, especially in homes with children or pets. It also helps contain any fumes emitted during printing, particularly when using materials like ABS or nylon.
5. Improved Print Quality: By controlling the environment around the printer, you can achieve better layer adhesion and reduce the chances of print failures. This is particularly important for larger prints that are more susceptible to temperature changes.
Materials Needed
To build a custom 3D printer enclosure, you will need the following materials:
- Aluminum Extrusion: Commonly used for the frame, aluminum extrusions are lightweight, strong, and easy to work with. They come in various profiles, allowing for flexibility in design.
- Corner Brackets: These will help connect the aluminum extrusions at the corners, providing stability to the structure.
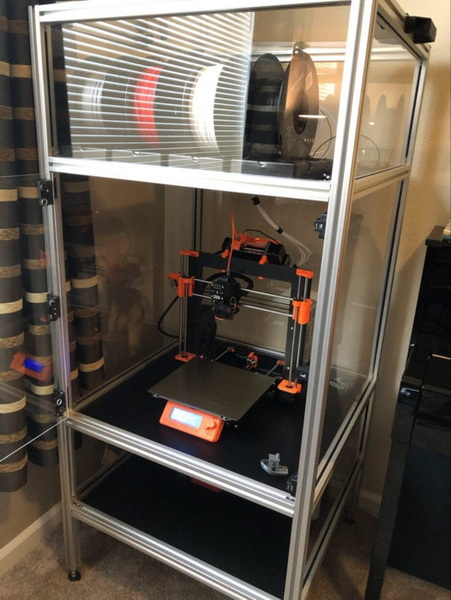
- Panels: You can use acrylic sheets, polycarbonate, or plywood for the walls of the enclosure. Acrylic is preferred for its transparency, allowing you to monitor prints easily.
- Doors: Consider using sliding doors or hinged doors for easy access to the printer. Ensure that the doors seal well to maintain the internal environment.
- Fans: To ensure proper ventilation, especially if you are printing with materials that emit fumes. Fans can help circulate air and prevent overheating.
- Power Supply: If you plan to add lights or fans, ensure you have a suitable power supply that can handle the additional load.
- Tools: You will need a saw (if cutting the extrusions), a drill, screws, and a measuring tape. A level is also useful to ensure everything is aligned properly.
Designing Your Enclosure
Step 1: Measure Your Printer
Start by measuring your 3D printer's dimensions, including height, width, and depth. This will help you determine the size of your enclosure. Make sure to leave some extra space for airflow and any additional components you might want to add, such as a spool holder or lighting.
Step 2: Create a Design Plan
Sketch out a design for your enclosure. Consider the following:
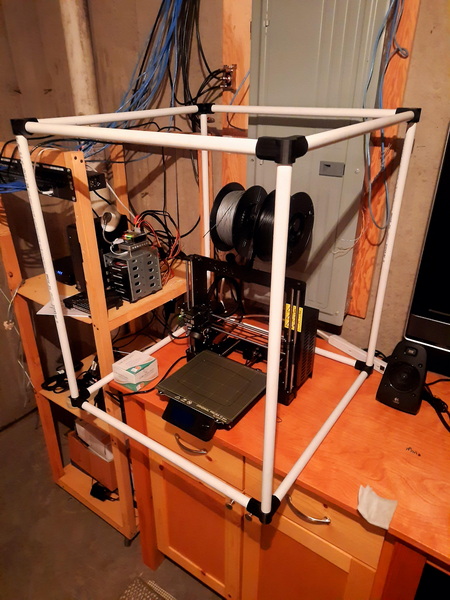
- Shape: A rectangular shape is the most common, but you can get creative with your design. Some users opt for a cube shape, while others may prefer a more elongated design to fit their workspace.
- Access: Plan how you will access the printer. Will you have a door on the front, or will it be open on one side? Think about how often you will need to access the printer for maintenance or to change filament.
- Ventilation: Ensure there is enough airflow to prevent overheating, especially if you are using a heated bed. You may want to include vents or additional fans to facilitate air circulation.
Step 3: Choose Your Materials
Select the materials for your enclosure based on your design. Aluminum extrusions are available in various sizes and shapes, so choose the ones that best fit your design. For the panels, consider using clear acrylic to allow visibility of the printer while still providing protection.

Building the Frame
Step 4: Cut the Aluminum Extrusions
Using a saw, cut the aluminum extrusions to the lengths specified in your design. Make sure to wear safety goggles and follow all safety precautions when using power tools. If you are unsure about cutting the extrusions yourself, many suppliers offer cutting services.
Step 5: Assemble the Frame
Using corner brackets, assemble the frame of your enclosure. Start with the base and then add the vertical supports. Ensure everything is square and level before tightening the screws. It's helpful to use a level during this process to ensure that your enclosure will sit flat.
Step 6: Attach the Panels
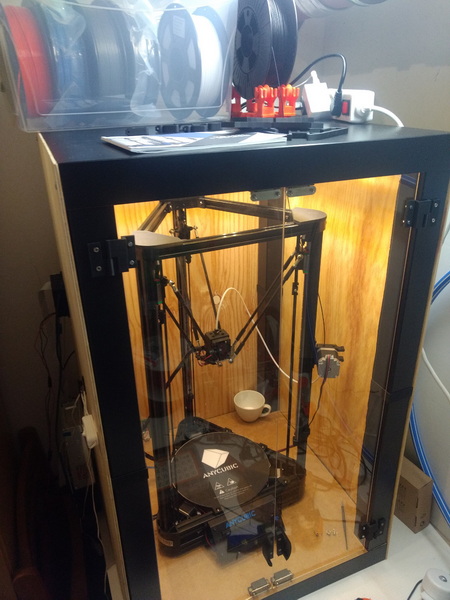
Once the frame is complete, attach the panels to the frame. If you are using acrylic sheets, you can use screws or brackets to secure them. Make sure to leave openings for ventilation and access points. If you are using plywood, consider painting or sealing it to protect against moisture.
Adding Doors and Ventilation
Step 7: Install Doors
Depending on your design, install the doors on the front or side of the enclosure. If you are using sliding doors, ensure they glide smoothly. Hinged doors should open easily without obstruction. You may want to add a latch or magnet to keep the doors closed during printing.
Step 8: Install Fans
To maintain airflow, install fans at the top and bottom of the enclosure. This will help circulate air and prevent overheating. You can use a simple 12V fan connected to a power supply. Consider using a fan controller to adjust the speed based on the internal temperature.
Finishing Touches
Step 9: Add Lighting
Consider adding LED strip lights inside the enclosure for better visibility. This is especially useful when monitoring prints in low-light conditions. You can install the lights along the top edge of the enclosure to illuminate the entire workspace.
Step 10: Organize Your Space
Add shelves or hooks inside the enclosure for organizing tools, filament, and other accessories. This will help keep your workspace tidy and efficient. You might also want to include a small drawer or container for storing spare parts and tools.
Testing Your Enclosure
Once your enclosure is complete, it's time to test it out. Place your 3D printer inside, close the doors, and run a test print. Monitor the temperature and airflow to ensure everything is functioning correctly. It's a good idea to run a few test prints with different materials to see how the enclosure performs under various conditions.
Maintenance Tips
- Regularly Check for Dust: Keep the enclosure clean to prevent dust buildup. Use a microfiber cloth to wipe down surfaces and remove any debris.
- Monitor Temperature: Use a thermometer to keep an eye on the internal temperature, especially when printing with materials that require specific conditions. If you notice the temperature fluctuating too much, consider adjusting your ventilation setup.
- Inspect Fans: Ensure that the fans are working properly and replace them if they become noisy or stop functioning. Regular maintenance will help prolong the life of your enclosure and printer.
- Check Seals: Over time, the seals around doors and panels may wear out. Regularly inspect these areas and replace any worn seals to maintain the enclosure's effectiveness.
Conclusion
Building a custom 3D printer enclosure with aluminum extrusion is a fantastic way to enhance your 3D printing experience. Not only does it protect your printer, but it also improves print quality and safety. With the right materials and a solid design plan, you can create an enclosure that meets your needs and fits your workspace perfectly. This project not only provides practical benefits but also allows you to express your creativity and craftsmanship.

Frequently Asked Questions
1. What materials are best for a 3D printer enclosure?
Aluminum extrusion is ideal for the frame due to its strength and lightweight properties. For the panels, clear acrylic or polycarbonate is recommended for visibility and durability. Plywood can also be used, but it may require additional finishing to protect against moisture.
2. How do I ensure proper ventilation in my enclosure?
Install fans at both the top and bottom of the enclosure to create airflow. This helps prevent overheating and maintains a stable temperature. You can also include vents or openings to allow for passive airflow.
3. Can I use a 3D printer enclosure for all types of printers?
Yes, most 3D printers can benefit from an enclosure, especially those that use materials sensitive to temperature changes, like ABS. However, ensure that your printer's specifications allow for enclosed environments, as some printers may require more airflow than others.
4. How much does it cost to build a custom 3D printer enclosure?
The cost can vary widely based on materials and size, but a basic enclosure can be built for around $100 to $300. If you opt for higher-quality materials or additional features, the cost may increase.
5. Is it necessary to have an enclosure for a 3D printer?
While not strictly necessary, an enclosure can significantly improve print quality and safety, especially for certain materials. It is particularly beneficial for users who print frequently or work in environments with fluctuating temperatures.


