Content Menu
● Understanding the Benefits of a 3D Printer Enclosure
● Materials Needed
● Designing Your Enclosure
>> Step 1: Measure Your Printer
>> Step 2: Plan Your Design
>> Step 3: Create a Parts List
● Building Your Enclosure
>> Step 4: Cut Aluminum Extrusions
>> Step 5: Assemble the Frame
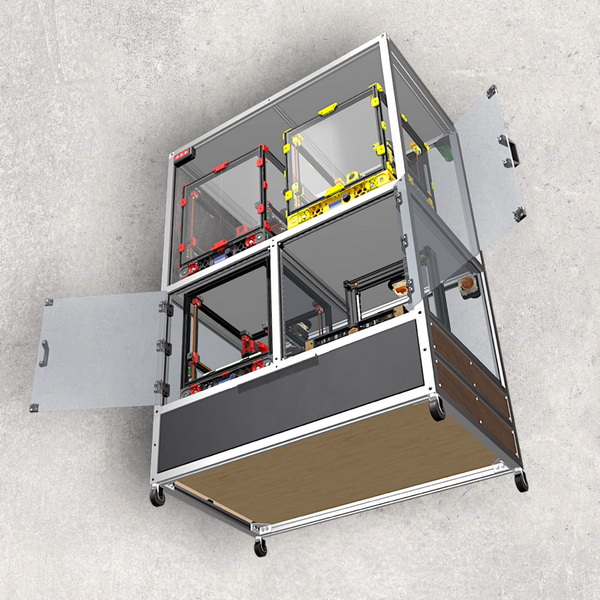
>> Step 6: Attach Panels
>> Step 7: Install Doors
>> Step 8: Add Ventilation
>> Step 9: Insulate (Optional)
>> Step 10: Final Touches
● Testing Your Enclosure
● Maintenance Tips
● Common Issues and Troubleshooting
● Conclusion
● Related Questions & Answers
>> 1. What materials are best for building a 3D printer enclosure?
>> 2. How do I ensure proper ventilation in my enclosure?
>> 3. Can I use my existing furniture as an enclosure?
>> 4. What temperature should I aim for inside my enclosure?
>> 5. How often should I clean my 3D printer enclosure?
Building a cost-effective 3D printer enclosure using aluminum extrusions is an excellent way to enhance your printing experience. An enclosure can help maintain optimal temperatures, reduce noise, and protect your printer from dust and other environmental factors. This article will guide you through the process of designing and constructing a 3D printer enclosure with aluminum extrusions, providing tips, tricks, and considerations along the way.

Understanding the Benefits of a 3D Printer Enclosure
Before diving into the construction process, it's essential to understand why an enclosure is beneficial for your 3D printer:
- Temperature Control: An enclosure helps maintain a stable temperature around the printer. This is particularly important for materials like ABS, which are prone to warping when cooled too quickly. The enclosure acts as a thermal barrier, reducing drafts and allowing the printer to maintain a consistent environment.
- Dust Protection: Keeping your printer enclosed protects it from dust and debris, which can affect print quality and mechanical components. Dust can settle on the print surface, leading to adhesion issues, while particles can interfere with moving parts.
- Noise Reduction: Enclosures can significantly reduce the noise generated by your printer during operation, making it more suitable for home or office environments. This is especially beneficial if you are printing large models that take several hours to complete.
- Safety: An enclosure can prevent accidental contact with hot components, making it safer, especially in homes with children or pets. It also reduces the risk of fire hazards associated with certain materials that may emit fumes when heated.
Materials Needed
To build a cost-effective 3D printer enclosure using aluminum extrusions, you will need the following materials:
- Aluminum Extrusion Profiles: These will form the frame of your enclosure. Common sizes include 20mm x 20mm or 30mm x 30mm profiles. Choose profiles based on the size and weight of your printer.
- Corner Brackets: To connect the aluminum extrusions at the corners securely. These brackets provide structural integrity to your enclosure.
- Fasteners: T-nuts and bolts are commonly used to assemble the frame. Ensure that you have enough fasteners to secure all joints firmly.
- Panels: You can use acrylic sheets or polycarbonate panels for the sides and top of the enclosure to allow visibility while maintaining heat retention. Polycarbonate is more impact-resistant than acrylic but may be more expensive.
- Doors: Consider using sliding doors or hinged doors for easy access to your printer. Ensure that they fit snugly to minimize heat loss.
- Ventilation Fans: If you plan to print with materials that emit fumes, adding ventilation fans is crucial for safety. Look for quiet fans that can effectively circulate air without adding too much noise.
- Thermal Insulation Material: Depending on your environment, you may want to insulate certain areas of your enclosure to maintain temperature. Insulation can be applied to specific sections or around the base of the enclosure.
Designing Your Enclosure
Step 1: Measure Your Printer
Start by measuring your 3D printer's dimensions. This includes its height, width, and depth. Make sure to account for any additional space needed for wiring and accessories. It's also wise to consider future upgrades; if you plan on getting a larger printer, factor in extra space now.
Step 2: Plan Your Design
Sketch out a design for your enclosure. Consider the following:
- Size: Ensure that the enclosure is large enough to accommodate your printer and any future upgrades. A good rule of thumb is to add at least 10% extra space around all sides of the printer.
- Accessibility: Plan where doors will be located for easy access to the printer. Make sure that you can reach all parts of the printer without difficulty.
- Ventilation: If you plan on using materials that produce fumes, include space for ventilation fans in your design. Positioning fans at opposite ends can create effective airflow throughout the enclosure.
Step 3: Create a Parts List
Once you have a design in mind, create a parts list based on your measurements. This list should include:
- The number of aluminum extrusion profiles needed.
- The number of corner brackets.
- The amount of panel material required.
- Any additional components such as fans or insulation.
Having a detailed parts list will help streamline your purchasing process and ensure you have everything you need before starting construction.

Building Your Enclosure
Step 4: Cut Aluminum Extrusions
Using a miter saw or hacksaw, cut your aluminum extrusions to the desired lengths based on your design. Make sure all cuts are straight and accurate for a snug fit. If possible, use a cutting service offered by many hardware stores to ensure precision.
Step 5: Assemble the Frame
Begin assembling the frame by connecting the aluminum extrusions using corner brackets and fasteners. Start with the base and then work your way up to form a rectangular structure. Use a square tool during assembly to ensure corners are at right angles.
Step 6: Attach Panels
Once the frame is assembled, attach your chosen panels (acrylic or polycarbonate) to the sides and top of the enclosure. Use screws or adhesive as appropriate for securing them in place. Ensure that there are no gaps where heat could escape; even small openings can lead to significant temperature fluctuations during printing.
Step 7: Install Doors
Install doors on one side of the enclosure. You can use sliding tracks or hinges depending on your preference. Make sure they open smoothly and provide easy access to your printer without obstructing airflow when closed.
Step 8: Add Ventilation
If you're using materials that require ventilation, install fans in designated areas. Ensure that there is an inlet for fresh air and an outlet for fumes. This setup will help maintain air quality inside the enclosure while allowing heat to escape when necessary.
Step 9: Insulate (Optional)
If you live in an area with extreme temperatures, consider adding insulation material inside certain areas of your enclosure to help maintain consistent temperatures during printing. Insulation can be especially beneficial if you're printing large models that take several hours or overnight prints.
Step 10: Final Touches
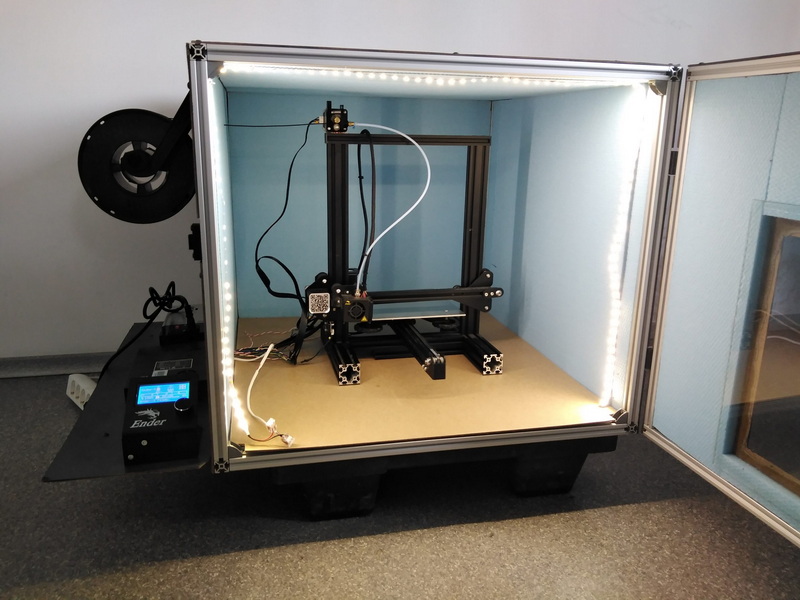
Once everything is assembled, double-check all connections and ensure that panels are secure. You may want to add LED lighting inside the enclosure for better visibility during operation—this can be particularly useful when troubleshooting prints or inspecting filament feeds.
Testing Your Enclosure
After building your enclosure, it's essential to test it before starting any serious printing projects:
1. Place your printer inside the enclosure.
2. Run a few test prints with different materials.
3. Monitor temperature fluctuations inside the enclosure using a thermometer.
4. Check if there is any noticeable noise reduction compared to printing without an enclosure.
5. Ensure that ventilation systems function correctly if installed; observe airflow patterns during operation.
Maintenance Tips
Maintaining your 3D printer enclosure is crucial for longevity and performance:
- Regularly check for dust accumulation inside the enclosure; clean as necessary using compressed air or a soft cloth.
- Inspect fans periodically to ensure they are working correctly; replace any malfunctioning units promptly.
- Clean acrylic or polycarbonate panels with appropriate cleaners designed for plastics; avoid abrasive materials that could scratch surfaces.
- Ensure that all fasteners remain tight over time as vibrations from printing can loosen them; perform periodic checks after heavy usage periods.
Common Issues and Troubleshooting
While building an aluminum extrusion enclosure is relatively straightforward, you may encounter some common issues:
- Warping Panels: If panels warp over time due to heat exposure or improper installation, consider reinforcing them with additional supports or replacing them with thicker material.
- Insufficient Ventilation: If you notice strong odors while printing certain materials, reassess fan placement or increase fan size/capacity for better airflow.
- Temperature Fluctuations: If temperatures inside fluctuate significantly during prints, check for gaps in panel seals or consider adding insulation where necessary.
Conclusion
Building a cost-effective 3D printer enclosure using aluminum extrusions not only enhances print quality but also improves safety and reduces noise levels in your workspace. By following this guide, you can create a customized solution tailored specifically to your needs while keeping costs manageable.

Related Questions & Answers
1. What materials are best for building a 3D printer enclosure?
- Acrylic and polycarbonate are popular choices due to their durability and transparency, allowing visibility while providing insulation against temperature fluctuations.
2. How do I ensure proper ventilation in my enclosure?
- Install intake and exhaust fans strategically placed at opposite ends of the enclosure; this creates effective airflow while maintaining temperature stability during printing sessions.
3. Can I use my existing furniture as an enclosure?
- Yes, many people repurpose cabinets or shelving units as enclosures; just ensure they provide adequate space and airflow without compromising safety features like heat dissipation.
4. What temperature should I aim for inside my enclosure?
- Ideally, maintain temperatures between 40°C to 60°C when printing with materials like ABS; this range helps prevent warping while ensuring print adhesion remains strong throughout production cycles.
5. How often should I clean my 3D printer enclosure?
- Regular cleaning every few weeks is advisable; however, more frequent cleaning may be necessary if you print frequently with materials that produce dust or debris accumulation around moving parts within machinery setups.


