Content Menu
● Introduction to Aluminum Extruders
>> Benefits of Aluminum Extruders
● Preparing for the Upgrade
>> Tools and Materials
● Step-by-Step Installation Guide
>> Step 1: Remove the Original Extruder
>> Step 2: Assemble the New Aluminum Extruder
>> Step 3: Install the New Extruder
>> Step 4: Test the Extruder
● Additional Upgrades
>> Capricorn PTFE Tubing
>> Direct Drive Extruders
● Conclusion
● FAQ
>> 1. What are the benefits of using an aluminum extruder on the Ender 5?
>> 2. How do I ensure proper cable management during the upgrade?
>> 3. Can I use a direct drive extruder with the Ender 5?
>> 4. What is the advantage of using Capricorn PTFE tubing?
>> 5. How do I calibrate the extruder steps after installing a new extruder?
● Citations:
The Creality Ender 5 is a popular 3D printer known for its reliability and high-quality prints. However, like any other printer, it can benefit from upgrades to enhance performance. One of the most significant upgrades you can make is installing an aluminum extruder, which offers better durability and heat management compared to the standard plastic extruder. In this guide, we will walk you through the process of installing an aluminum extruder on your Ender 5.

Introduction to Aluminum Extruders
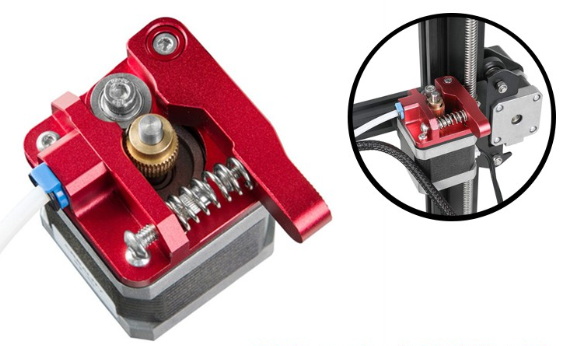
Aluminum extruders are designed to improve the overall printing experience by providing a more stable and efficient filament feeding system. They are typically made from durable materials and are less prone to wear and tear compared to plastic extruders. The upgrade process involves replacing the existing extruder with a new aluminum one, which can be a bit challenging but is definitely worth the effort.
Benefits of Aluminum Extruders
- Durability: Aluminum extruders are more robust and less likely to break or deform under stress.
- Heat Management: Aluminum is a good conductor of heat, which helps in maintaining a consistent temperature around the hotend.
- Improved Filament Grip: The metal design often includes better filament gripping mechanisms, reducing slippage and improving print quality.
Preparing for the Upgrade
Before starting the installation, ensure you have all the necessary tools and parts:
- Aluminum Extruder Kit: This should include the extruder body, gears, and any other required hardware.
- Allen Wrenches: For removing screws.
- Pliers: For handling small parts.
- Zip Ties: For cable management.
Tools and Materials
| Item | Description |
| Aluminum Extruder Kit | Includes extruder body, gears, and hardware. |
| Allen Wrenches | For unscrewing parts. |
| Pliers | For handling small components. |
| Zip Ties | For organizing cables. |
Step-by-Step Installation Guide
Step 1: Remove the Original Extruder
1. Disconnect Power: Ensure your printer is turned off and unplugged.
2. Remove Cables: Detach the extruder motor and heater cables from the control board.
3. Unscrew the Extruder: Use an Allen wrench to remove the screws holding the extruder in place. Be careful as the stepper motor will come loose once the screws are removed.
4. Set Aside the Stepper Motor: Gently place the motor on the print bed to prevent it from getting damaged.
Step 2: Assemble the New Aluminum Extruder
1. Mount the Motor: Attach the stepper motor to the new extruder using the provided screws. Ensure the motor wires face downwards.
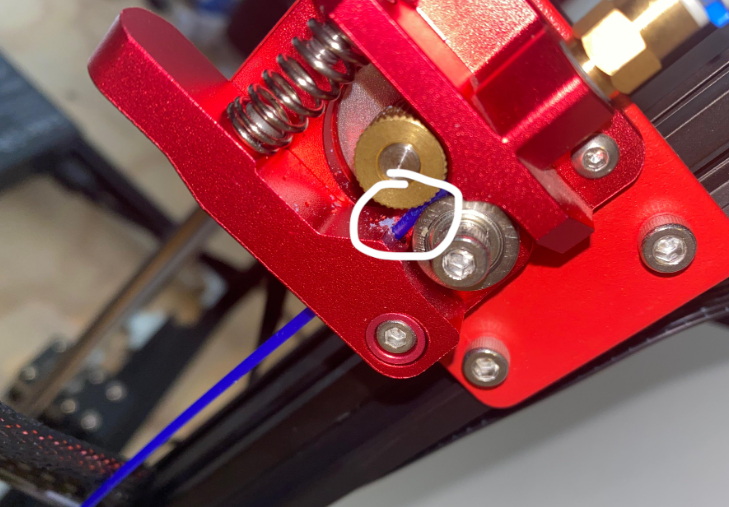
2. Install Gears and Idler: Place the gears and idler onto the extruder body according to the manufacturer's instructions.
3. Secure the Filament Path: Ensure the filament path is clear and properly aligned with the hotend.
Step 3: Install the New Extruder
1. Mount the Extruder: Slide the new extruder into the T-slot on the printer frame, ensuring it is securely fastened with screws.
2. Reconnect Cables: Plug the motor and heater cables back into the control board.
3. Secure Cables: Use zip ties to manage cables and prevent them from getting in the way.
Step 4: Test the Extruder
1. Power On: Turn on your printer and check for any errors.
2. Extrude Filament: Use the control panel or software to extrude a small amount of filament to ensure everything is working correctly.

Additional Upgrades
Capricorn PTFE Tubing
Upgrading to Capricorn PTFE tubing can further enhance your printing experience by providing a smoother filament flow and better heat resistance.
- Benefits: Tight tolerances, high temperature rating (up to 300°C), and improved print quality.
Direct Drive Extruders
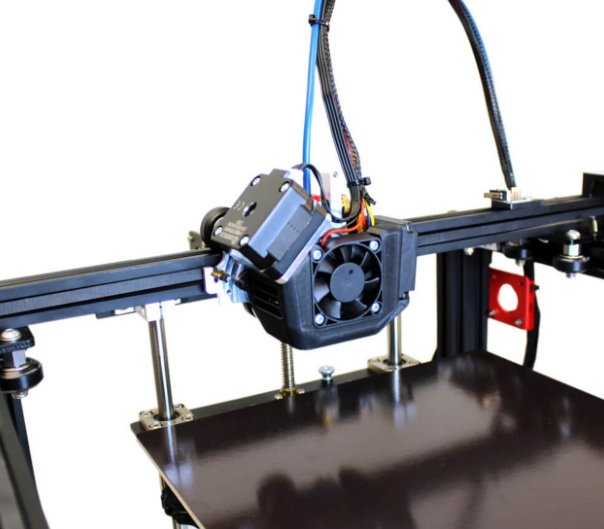
For those interested in printing flexible filaments, consider upgrading to a direct drive extruder like the Micro Swiss Direct Drive Extruder. This setup reduces the distance between the drive and hotend, making it ideal for flexible materials.
- Features: Dual-drive train, hardened tool steel gears, and adjustable filament grip.
Conclusion
Upgrading your Ender 5 with an aluminum extruder is a straightforward process that can significantly improve your printing experience. By following these steps and considering additional upgrades like Capricorn PTFE tubing or direct drive extruders, you can enhance the durability and performance of your printer.

FAQ
1. What are the benefits of using an aluminum extruder on the Ender 5?
Aluminum extruders offer better durability and heat management compared to plastic ones, improving overall print quality and reducing the risk of mechanical failures.
2. How do I ensure proper cable management during the upgrade?
Use zip ties to secure cables and keep them organized. This prevents them from interfering with the printer's operation and reduces wear on the cables.
3. Can I use a direct drive extruder with the Ender 5?
Yes, direct drive extruders like the Micro Swiss model are compatible with the Ender 5. They are ideal for printing flexible filaments and offer improved extrusion control.
4. What is the advantage of using Capricorn PTFE tubing?
Capricorn PTFE tubing provides a smoother filament flow and is rated for higher temperatures, making it suitable for printing materials like ABS and PETG.
5. How do I calibrate the extruder steps after installing a new extruder?
Calibrate the extruder steps by measuring how much filament is actually extruded compared to what is commanded. Adjust the e-steps value in your printer's firmware accordingly to achieve accurate extrusion.
Citations:
[1] https://www.youtube.com/watch?v=BrYDH4RWojY
[2] https://makersteve.com/2019/07/22/ultimate-build-guide-to-ender-5-step-by-step-a-makersteve-special-report/
[3] https://store.micro-swiss.com/products/micro-swiss-direct-drive-extruder-for-creality-ender-5
[4] https://www.obico.io/blog/ender-5-upgrades/
[5] https://www.youtube.com/watch?v=pVFlGRmqNxI
[6] http://wiki.fysetc.com/Ender%205%203D%20printer%20Direct%20Drive%20Extruder%20Plate/
[7] https://letsprint3d.net/how-to-calibrate-the-extruder-steps-ender-3-5-cr-10/
[8] https://www.3djake.com/reviews/creality-3d-printers-spare-parts/metal-extruder-upgrade-kit
[9] https://www.youtube.com/watch?v=k6eDBkc1mDg
[10] https://support.bondtech.se/Guide/02.%20Installing%20DDX%20On%20Creality%20Ender-5/75.html
[11] https://www.youtube.com/watch?v=TPyTiZ6-_jM
[12] https://www.aliexpress.com/item/1005005389239793.html
[13] https://www.youtube.com/watch?v=UtemZqFJ5rY
[14] https://www.youtube.com/watch?v=gdUtgity2JM
[15] https://www.youtube.com/watch?v=hbq5H7R1NLg
[16] https://support.th3dstudio.com/helpcenter/upgraded-aluminum-extruder-installation-video-v2/
[17] https://www.reddit.com/r/ender5/comments/ut5egw/ender_5_aluminum_extrusion_sizes/
[18] https://www.reddit.com/r/ender3v2/comments/v6mmkl/getting_ready_to_add_an_all_metal_extruder/
[19] https://www.reddit.com/r/ender5/comments/kgvd7k/best_upgrade_ever/
[20] https://www.youtube.com/playlist?list=PLWrqQ7NBLxmACgUvZXo9W4MlsXVWq-__S
[21] https://www.ebay.co.uk/itm/293005666792
[22] https://makersteve.com/2019/03/19/a-tale-of-eight-enders-aluminum-extruder-upgrade/
[23] https://www.aliexpress.com/item/1005004923874649.html
[24] https://www.reddit.com/r/ender5/comments/ij5iqy/ender_5_pro_metal_extruder_question/
[25] https://www.reddit.com/r/ender5/comments/gmej0m/my_ender5_upgrade_experiences_issues_and_how_i/
[26] https://forum.makerforums.info/t/creality-ender-5-extrusion-problems/92522
[27] https://www.youtube.com/watch?v=RnByRMVErjU
[28] https://community.ultimaker.com/topic/45764-my-ender-5-stopped-printing/
[29] https://www.nutsvolts.com/magazine/article/creality-ender-5-pro-a-review
[30] https://www.reddit.com/r/ender5/
[31] https://gzhls.at/blob/ldb/9/d/2/d/494d6eb381cc19375f4f403af570d0fe0e91.pdf
[32] https://3dgearzone.com/creality/creality-ender-5-3d-printer/


