Content Menu
● Why Upgrade to an Aluminum Extruder?
● Tools and Materials Needed
● Step-by-Step Installation Process
>> Step 1: Preparing Your Printer
>> Step 2: Installing the Aluminum Extruder
>> Step 3: Reconnecting Components
>> Step 4: Testing Your New Extruder
● Understanding Common Issues with Extruders
● Maintenance Tips for Your Aluminum Extruder
● Conclusion
● FAQ
>> 1. What are the benefits of using an aluminum extruder over a plastic one?
>> 2. Do I need any special tools for installation?
>> 3. Will I need to recalibrate my printer after installing an aluminum extruder?
>> 4. Can I use flexible filament with an aluminum extruder?
>> 5. How long does it take to install an aluminum extruder?
● Citations:
Upgrading your Creality Ender 3 V2 with an aluminum extruder is a great way to enhance the durability and performance of your 3D printer. The stock plastic extruder can wear out over time, leading to issues such as under-extrusion or even complete failure. In this guide, we will walk you through the step-by-step process of installing an aluminum extruder, ensuring that you have all the necessary tools and information to make the upgrade successfully.

Why Upgrade to an Aluminum Extruder?
- Durability: Aluminum extruders are sturdier than their plastic counterparts, reducing the risk of breaking or wearing down.
- Better Filament Grip: Metal gears provide a more reliable grip on the filament, leading to improved extrusion consistency.
- Enhanced Performance: An aluminum extruder can handle a wider variety of filament types, including flexible materials.
- Improved Heat Dissipation: Aluminum conducts heat more efficiently than plastic, which helps dissipate heat away from the motor and filament.
- Longer Lifespan: An aluminum extruder is likely to last much longer than its plastic counterpart due to its robust construction and resistance to wear.
Tools and Materials Needed
Before starting the installation, gather the following tools and materials:
- Aluminum extruder kit (compatible with Ender 3 V2)
- Allen wrenches (typically included with the printer)
- Screwdriver
- PTFE tube cutter (if necessary)
- Lubricant (optional for smoother operation)
Step-by-Step Installation Process
Step 1: Preparing Your Printer
1. Power Off: Ensure that your Ender 3 V2 is turned off and unplugged from the power source.
2. Remove Filament: Heat up the hot end to about 200°C to soften any filament inside. Once heated, pull the filament out gently.
3. Remove Existing Extruder:
- Unscrew the Bowden tube coupler from the old extruder.
- Detach any wiring connected to the stepper motor.
- Remove screws securing the plastic extruder assembly; hold the motor in place while doing this to prevent it from falling.
Step 2: Installing the Aluminum Extruder
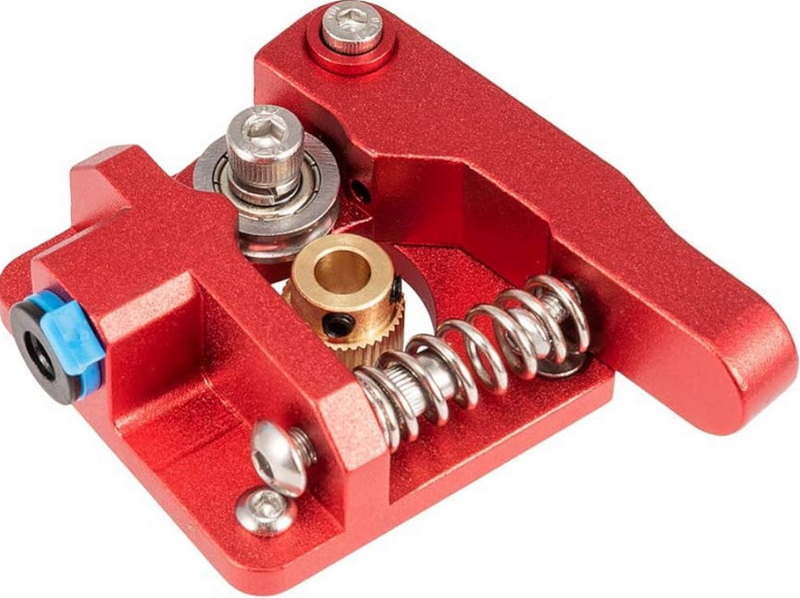
1. Assemble New Extruder Parts:
- Take out all components from your aluminum extruder kit.
- Attach the drive gear to the stepper motor shaft. Ensure that one of the grub screws aligns with the flat side of the motor shaft for a secure fit.
2. Mounting Base Plate:
- Place the aluminum base plate onto the stepper motor.
- Secure it using provided screws, making sure everything is aligned correctly.
3. Attach Lever Arm:
- Connect the lever arm to the base plate using a screw. Ensure it can pivot freely without excessive play.
- Insert a spring into position; this will provide tension for filament feeding.
4. Install Pulley and Tensioner:
- Attach the pulley wheel onto the lever arm using a lock washer and bolt.
- Adjust tension by compressing the spring slightly while securing it in place.
Step 3: Reconnecting Components
1. Reattach Bowden Tube:
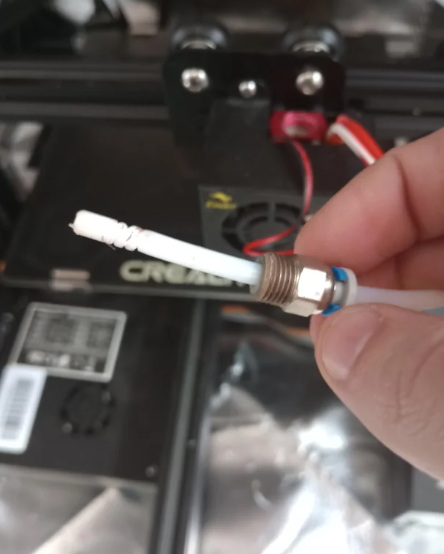
- Insert the PTFE tube back into its coupler on the new aluminum extruder.
- Ensure it is pushed in firmly and secured with any clips provided in your kit.
2. Reconnect Wiring:
- Plug in any wiring that was disconnected during removal.
- Make sure all connections are secure before powering on.
Step 4: Testing Your New Extruder
1. Power On Printer: Turn on your Ender 3 V2 and navigate to your printer settings.
2. Load Filament: Feed filament into your new aluminum extruder and ensure it moves smoothly through the system.
3. Calibrate E-Steps: After installation, recalibrate your E-steps to ensure accurate extrusion rates.
4. Test Print: Run a test print to check for any issues with extrusion or alignment.

Understanding Common Issues with Extruders
Even after installing an aluminum extruder, you may encounter some issues during operation. Here are common problems and their solutions:
- Under-Extrusion: This can occur if there is insufficient tension on the lever arm or if there is a blockage in the PTFE tube. Check that everything is assembled correctly and that there are no clogs in your hot end.
- Over-Extrusion: This may happen if your E-steps are not calibrated correctly or if you are using incorrect slicer settings. Always double-check these parameters after making changes to your hardware.
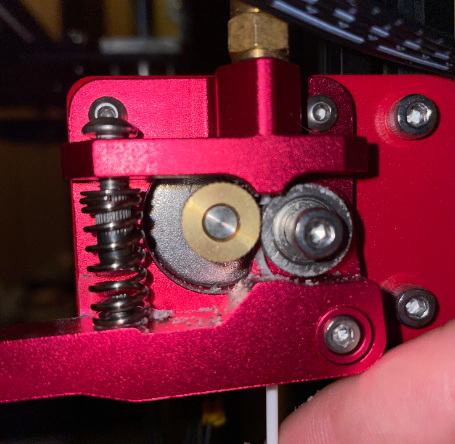
- Filament Slipping: If you notice that your filament is slipping, ensure that your drive gear is clean and free from debris. Additionally, check that there is adequate tension on the lever arm spring.
Maintenance Tips for Your Aluminum Extruder
To ensure optimal performance from your new aluminum extruder, regular maintenance is essential:
- Cleaning: Periodically clean the drive gear and idler pulley to remove any accumulated filament dust or debris that could affect performance.
- Lubrication: If your extruder has moving parts, consider applying a small amount of lubricant to keep everything operating smoothly.
- Regular Inspections: Check for any signs of wear or damage regularly, especially if you frequently print with abrasive filaments.
Conclusion
Installing an aluminum extruder on your Ender 3 V2 can significantly improve its performance and longevity. This upgrade is not only straightforward but also enhances your printing experience by providing better filament handling and reducing maintenance issues associated with plastic parts.
By following this guide, you should be able to complete your installation successfully and enjoy improved print quality from your upgraded machine. The investment in an aluminum extruder pays off in terms of durability, reliability, and overall print quality enhancement.

FAQ
1. What are the benefits of using an aluminum extruder over a plastic one?
Aluminum extruders are more durable, provide better grip on filament, and can handle a wider range of materials compared to plastic extruders.
2. Do I need any special tools for installation?
No special tools are required beyond what typically comes with your Ender 3 V2; standard Allen wrenches will suffice.
3. Will I need to recalibrate my printer after installing an aluminum extruder?
Yes, recalibrating your E-steps is recommended after any major component change like an extruder upgrade.
4. Can I use flexible filament with an aluminum extruder?
Yes, aluminum extruders generally perform better with flexible filaments due to their stronger grip and consistent pressure.
5. How long does it take to install an aluminum extruder?
The installation process typically takes about 30 minutes to an hour, depending on your familiarity with printer components.
Citations:
[1] https://www.crealityexperts.com/creality-extruder-upgrade-instructions
[2] https://www.yjing-extrusion.com/can-you-use-an-aluminum-extruder-on-ender-3.html
[3] https://store.creality.com/blog/ender-3-v2-upgrades
[4] https://docs.sainsmart.com/article/fkyuwu4jhq-ender-3-v-2-3-d-printer
[5] https://letsprint3d.net/how-to-upgrade-the-extruder-ender-3/
[6] https://www.youtube.com/watch?v=RLsALMPDb84
[7] https://blog.goldsupplier.com/metal-extruder/
[8] https://m.media-amazon.com/images/I/B1f9eP6H3OS.pdf
[9] https://www.youtube.com/watch?v=VrqZgU8G3rQ
[10] https://community.ultimaker.com/topic/46158-ender3-v2-all-metal-extruder-scrapes-filament-to-grit/
[11] https://www.reddit.com/r/3Dprinting/comments/q0xjka/is_it_worth_upgrading_to_an_all_metal_extruder/
[12] https://www.youtube.com/watch?v=pVFlGRmqNxI
[13] https://www.youtube.com/watch?v=UtemZqFJ5rY
[14] https://www.youtube.com/watch?v=uyFGLYJZfrM
[15] https://winsinn.com/ender-3-v2-upgrades/
[16] https://www.youtube.com/watch?v=ikVFselJO4Y
[17] https://www.youtube.com/watch?v=m6dRh0oVzhc
[18] https://www.bastelgarage.ch/e3d-titan-direct-extruder-upgrade-kit-for-ender-3-v2
[19] https://www.reddit.com/r/ender3v2/comments/v6mmkl/getting_ready_to_add_an_all_metal_extruder/
[20] https://www.reddit.com/r/ender3v2/comments/wjxsaj/problems_after_installing_metal_extruder/


