Content Menu
● Understanding 2020 Aluminum Extrusions
>> What Are 2020 Aluminum Extrusions?
>> Common Accessories
● Tools You Will Need
● Step-by-Step Installation Guide
>> Step 1: Planning Your Design
>> Step 2: Cutting the Extrusions
>> Step 3: Preparing the T-Nuts
>> Step 4: Assembling the Frame
>> Step 5: Adding Accessories
>> Step 6: Final Adjustments
>> Step 7: Finishing Touches
● Tips for Success
● Video Tutorials
● Conclusion
● Frequently Asked Questions
>> 1. What tools do I need to install 2020 aluminum extrusion accessories?
>> 2. Can I cut aluminum extrusions at home?
>> 3. How do I ensure my assembly is level?
>> 4. What are T-nuts used for?
>> 5. How can I make my assembly look professional?
Installing 2020 aluminum extrusion accessories can seem daunting at first, but with the right tools, techniques, and a bit of guidance, you can achieve professional results. This article will guide you through the entire process, from understanding the components to the final assembly, ensuring that you can install these accessories like a pro.

Understanding 2020 Aluminum Extrusions
What Are 2020 Aluminum Extrusions?
2020 aluminum extrusions are versatile structural components used in various applications, including robotics, furniture, and custom machinery. The "2020" designation refers to the dimensions of the extrusion, which is 20mm x 20mm. These extrusions feature T-slots, allowing for easy attachment of accessories and components.
Common Accessories
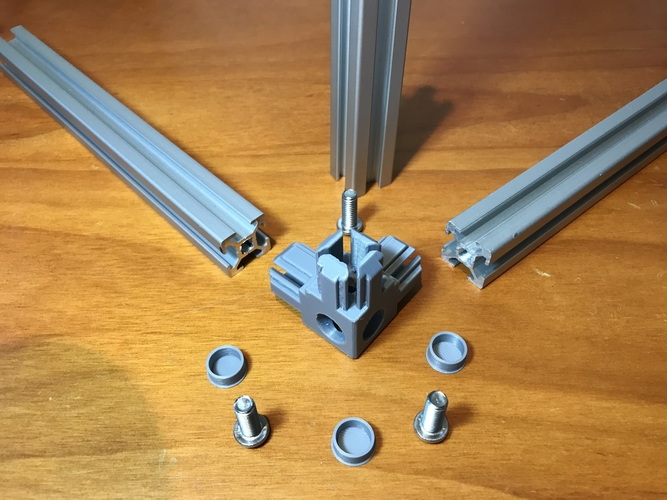
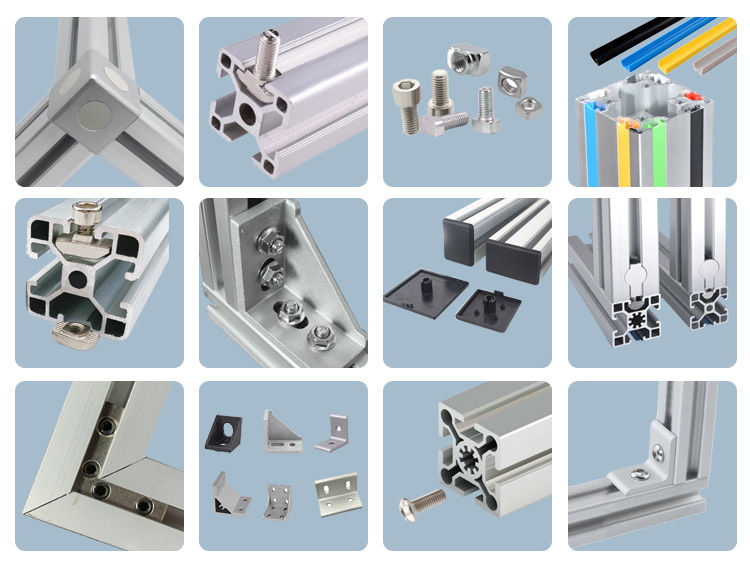
When working with 2020 aluminum extrusions, you will encounter a variety of accessories, including:
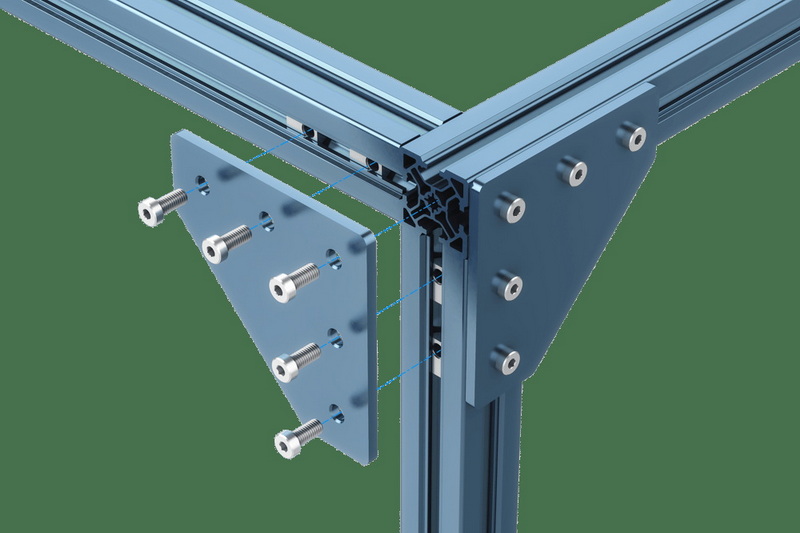
- Corner Brackets: Used to create strong joints between two extrusions.
- T-Nuts: These slide into the T-slots and allow for secure fastening of components.
- End Caps: Used to finish the ends of the extrusions for a clean look.
- Connectors: Various types of connectors help join multiple extrusions together.
- Brackets and Mounts: These are used to attach panels, shelves, or other components to the frame.
Tools You Will Need
Before you start the installation process, gather the following tools:
- Allen Wrench: For tightening bolts and screws.
- Screwdriver: A flathead or Phillips screwdriver may be needed for certain accessories.
- Measuring Tape: To ensure accurate measurements.
- Level: To ensure your assembly is straight and true.
- Cutting Tool: If you need to cut the extrusions to specific lengths.
- Drill: For creating holes if necessary, especially when adding custom features.
Step-by-Step Installation Guide
Step 1: Planning Your Design
Before you begin assembling, it's crucial to plan your design. Sketch out your project, noting where each extrusion and accessory will go. This will help you visualize the final product and ensure you have all the necessary components. Consider the purpose of your assembly and how it will be used, as this will influence your design choices.
Step 2: Cutting the Extrusions
If your extrusions are not pre-cut, measure and mark the lengths you need. Use a cutting tool suitable for aluminum, such as a miter saw or a hacksaw, to make clean cuts. Always wear safety goggles when cutting to protect your eyes from metal shavings. After cutting, deburr the edges to remove any sharp edges that could cause injury or interfere with assembly.
Step 3: Preparing the T-Nuts
Insert T-nuts into the T-slots of the extrusions where you plan to attach accessories. Make sure the T-nuts are oriented correctly so that the threaded hole is accessible from the outside of the extrusion. This step is crucial as it allows for easy attachment of components later in the assembly process.
Step 4: Assembling the Frame
Start by connecting the main frame of your project. Use corner brackets to join the extrusions at right angles. Align the extrusions and secure them with bolts through the T-nuts. Use an Allen wrench to tighten the bolts, ensuring everything is snug but not overly tight, which could strip the threads. It's important to check for squareness at this stage; use a carpenter's square to ensure that the corners are at 90 degrees.
Step 5: Adding Accessories
Once the frame is assembled, you can start adding accessories. This may include shelves, panels, or other components. Use the T-nuts to secure these accessories in place. Make sure to check for level and alignment as you go. If you are adding shelves, consider the weight they will need to support and adjust the number of supports accordingly.
Step 6: Final Adjustments
After all components are installed, double-check all connections. Ensure that everything is tight and secure. If necessary, make adjustments to ensure that the assembly is level and aligned properly. This is also a good time to check for any loose parts that may need additional tightening.
Step 7: Finishing Touches
Finally, add end caps to the exposed ends of the extrusions for a polished look. This not only improves aesthetics but also prevents dust and debris from entering the T-slots. If your project requires a more finished appearance, consider painting or anodizing the aluminum to match your decor or branding.

Tips for Success
- Take Your Time: Rushing can lead to mistakes. Take your time to ensure everything is measured and aligned correctly.
- Use a Level: Always check for level as you assemble. This will save you time in the long run.
- Keep Your Workspace Organized: An organized workspace will help you find tools and components quickly, making the installation process smoother.
- Test Fit Before Final Assembly: Before tightening everything down, do a test fit of all components to ensure they fit together as expected.
- Document Your Process: If you plan to replicate your project or share it with others, take notes or photos during the assembly process.
Video Tutorials
To further assist you in the installation process, here are some helpful video tutorials:
1. How to Mount Panels - Aluminum Extrusions
A comprehensive guide on mounting panels using aluminum extrusions.
2. Easiest Way To Connect Aluminum Extrusion Together
A quick tutorial on connecting aluminum extrusions effectively.
3. How To Build Anything with Aluminum Extrusion
A detailed video on building various projects using aluminum extrusions.
Conclusion
Installing 2020 aluminum extrusion accessories can be a rewarding project that enhances your DIY capabilities. By following the steps outlined in this guide, you can achieve a professional-looking assembly that meets your needs. Remember to take your time, plan your design, and enjoy the process of building with aluminum extrusions. With practice, you will become more proficient and confident in your ability to create custom structures that are both functional and aesthetically pleasing. Whether you are building a simple frame or a complex assembly, the versatility of 2020 aluminum extrusions will allow you to bring your ideas to life.

Frequently Asked Questions
1. What tools do I need to install 2020 aluminum extrusion accessories?
You will need an Allen wrench, screwdriver, measuring tape, level, and a cutting tool if you need to cut the extrusions.
2. Can I cut aluminum extrusions at home?
Yes, you can cut aluminum extrusions at home using a miter saw or hacksaw. Just ensure you wear safety goggles for protection.
3. How do I ensure my assembly is level?
Use a level tool to check that your assembly is straight and true as you build. Adjust as necessary before tightening all bolts.
4. What are T-nuts used for?
T-nuts are used to secure components to the T-slots of aluminum extrusions. They slide into the slots and provide a threaded hole for bolts.
5. How can I make my assembly look professional?
Use end caps to finish the exposed ends of the extrusions, and ensure all connections are tight and aligned for a clean, professional appearance.


