Content Menu
● Introduction to the Ender 3 Aluminum Extruder
>> Why Upgrade to an Aluminum Extruder?
● Ender 3 Aluminum Extruder Assembly Guide
>> Tools Required
>> Step-by-Step Assembly Instructions
>> Additional Tips
● Conclusion
● FAQ
>> 1. What Tools Are Required for the Upgrade?
>> 2. How Do I Prevent the Stepper Motor from Falling During Disassembly?
>> 3. Why Is It Important to Recalibrate E-Steps After the Upgrade?
>> 4. Can I Use Any Aluminum Extruder Kit for the Ender 3?
>> 5. How Often Should I Perform Maintenance on the New Extruder?
● Citations:
Assembling an aluminum extruder for your Ender 3 is a straightforward process that can significantly enhance the performance and durability of your 3D printer. This guide will walk you through the steps required to upgrade from the stock plastic extruder to a more robust aluminum one, ensuring better filament handling and reduced wear over time.

Introduction to the Ender 3 Aluminum Extruder
The Creality Ender 3 is a popular budget-friendly 3D printer known for its reliability and versatility. However, its stock plastic extruder can be prone to wear and tear, especially with frequent use. Upgrading to an aluminum extruder not only improves the structural integrity but also enhances the overall printing experience by providing better thermal management and filament control.
Why Upgrade to an Aluminum Extruder?
Upgrading to an aluminum extruder offers several benefits:
- Durability: Aluminum is more resistant to wear and tear compared to plastic, ensuring that your extruder lasts longer.
- Thermal Performance: Aluminum conducts heat better, which can help in maintaining consistent temperatures during printing.
- Filament Control: The sturdier design allows for more precise control over filament movement, reducing issues like jamming or slipping.
Ender 3 Aluminum Extruder Assembly Guide
Tools Required
Before starting the assembly, ensure you have the following tools:
- Allen Wrenches: Typically 1.5mm, 2mm, and 2.5mm.
- Screwdriver: For handling screws and other components.
- Pliers: Optional, for gripping small parts.
- New Aluminum Extruder Kit: This includes all necessary components for the upgrade.

Step-by-Step Assembly Instructions
1. Turn Off the Printer and Unload Filament:
- Ensure your Ender 3 is powered off.
- Remove any filament from the extruder by heating up the hotend and gently pulling it out.
2. Disconnect the Stepper Motor:
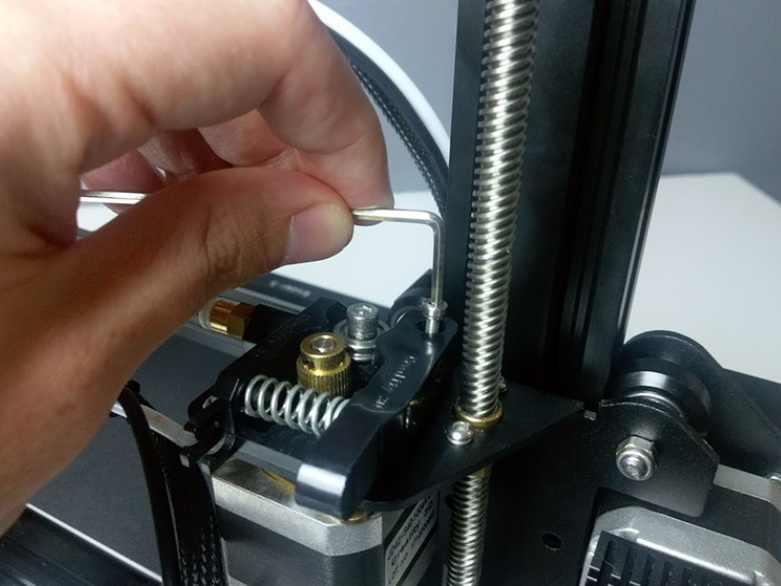
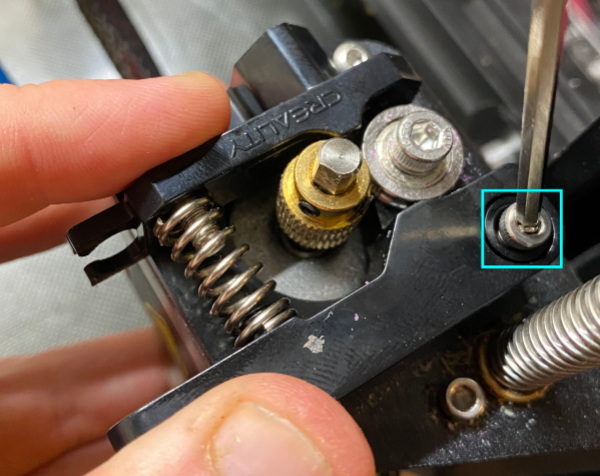
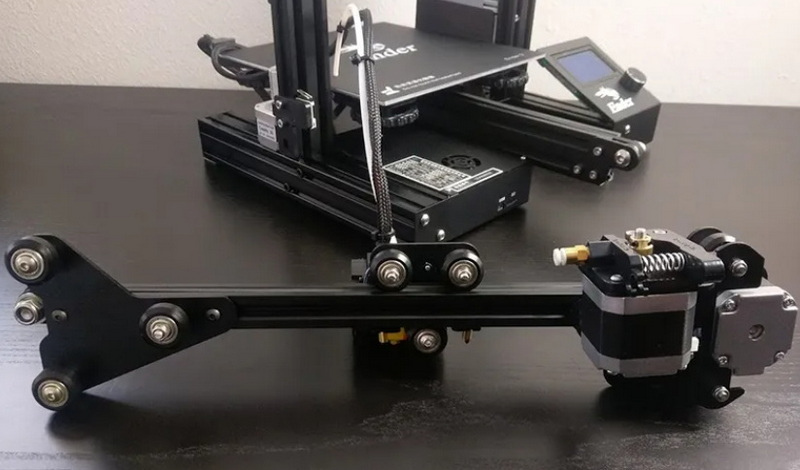
- Remove the screws attaching the stepper motor to the extruder body. Hold the motor while unscrewing to prevent it from falling.
3. Detach the Lever Arm:
- Unscrew and remove the lever arm from the old extruder assembly.
4. Attach the Base Plate:
- Place the new aluminum base plate onto the motor. Secure it using screws provided in your kit.
5. Install Gear:
- Slide on the new gear onto the motor shaft, ensuring one of its grub screws aligns with the flat part of the motor shaft for a secure fit.
6. Assemble Lever Arm:
- Attach the lever arm and idler pulley using screws, ensuring that it can pivot freely.
7. Reconnect Bowden Tube:
- Insert and secure the Bowden tube into its new coupling on the aluminum extruder.
8. Reconnect Wiring:
- Plug back in any electrical connectors that were disconnected during disassembly.
9. Power On Your Printer:
- Turn on your Ender 3 and perform a test print to ensure everything is functioning correctly.
10. Calibrate E-Steps:
- After changing your extruder, it's crucial to recalibrate your e-steps for accurate filament extrusion.
Additional Tips
- Use a Cable Management System: To keep your setup tidy and prevent cable damage.
- Regular Maintenance: Check for loose screws and clean the extruder regularly.
Conclusion
Upgrading to an aluminum extruder on your Ender 3 is a worthwhile investment that enhances the printer's performance and longevity. By following this guide, you can ensure a smooth transition from the stock plastic extruder to a more robust aluminum one. Remember to test your setup thoroughly after assembly and adjust settings as needed for optimal printing results.

FAQ
1. What Tools Are Required for the Upgrade?
- Allen wrenches (1.5mm, 2mm, and 2.5mm), screwdriver, pliers (optional), and a new aluminum extruder kit.
2. How Do I Prevent the Stepper Motor from Falling During Disassembly?
- Hold the motor firmly while unscrewing it to prevent it from falling.
3. Why Is It Important to Recalibrate E-Steps After the Upgrade?
- Recalibrating e-steps ensures accurate filament extrusion, which is crucial for maintaining print quality.
4. Can I Use Any Aluminum Extruder Kit for the Ender 3?
- It's recommended to use a kit specifically designed for the Ender 3 to ensure compatibility and ease of installation.
5. How Often Should I Perform Maintenance on the New Extruder?
- Regularly check for loose screws and clean the extruder to prevent issues like jamming or reduced performance.
Citations:
[1] https://www.yjing-extrusion.com/how-to-upgrade-to-an-ender-3-aluminum-extruder.html
[2] https://www.yjing-extrusion.com/what-are-the-steps-to-install-an-aluminum-extruder-on-your-ender-3.html
[3] https://www.youtube.com/watch?v=OgI-rJljayY
[4] https://www.youtube.com/watch?v=uMHtzwEHfUc
[5] https://www.youtube.com/watch?v=zJRxRVN3p3Y
[6] https://www.youtube.com/watch?v=pVFlGRmqNxI
[7] https://www.youtube.com/watch?v=k6eDBkc1mDg
[8] https://www.crealityexperts.com/creality-extruder-upgrade-instructions
[9] https://letsprint3d.net/how-to-upgrade-the-extruder-ender-3/
[10] https://www.youtube.com/watch?v=rzNmFK2zIWo
[11] https://www.youtube.com/watch?v=UtemZqFJ5rY
[12] https://www.reddit.com/r/ender3v2/comments/v6mmkl/getting_ready_to_add_an_all_metal_extruder/
[13] https://makersteve.com/2018/08/25/ultimate-build-guide-for-creality-ender-3-step-by-step-a-makersteve-special-report/
[14] https://support.th3dstudio.com/helpcenter/upgraded-aluminum-extruder-installation-video-v2/
[15] https://www.reddit.com/r/ender3/comments/eqeddp/the_all_aluminum_extruder_upgrade_is_only_ten/
[16] https://www.aliexpress.com/item/1005006523519131.html
[17] https://www.youtube.com/watch?v=ikVFselJO4Y
[18] https://www.instructables.com/How-to-Setup-Creality-Ender-3-3d-Printer/
[19] https://images-na.ssl-images-amazon.com/images/I/A1RtrhQ8ZOL.pdf
[20] https://www.youtube.com/watch?v=VrqZgU8G3rQ
[21] https://wol3d.com/product/ender-3-extruder-assembly/


